Chalice Basics
Understanding the Basics
If you have used Flask framework before, you have probably used decorators such as route() or endpoint() to link a function to your API calls. Chalice has similar decorators and many more that can give your application functions higher order functionality. Some main decorators to keep in mind for this workshop are route() and lambda_function().
If you would like to learn more about decorators, here are some helpful resources:
Take a look at app.py in your project directory:
from chalice import Chalice

app = Chalice(app_name='chalice-workshop')


@app.route('/')
def index():
    """
    Returns a dictionary at API route '/'
    """
    return {'hello': 'world'}
When a request is made to the / endpoint, the response is returned by the index() function.
Understanding the Config file
To view the config file, you will want to navigate to the root of your Chalice project and go to the .chalice/ sub directory. In this directory, you will see a file called config.json. When a new project is created, Chalice generates a default configuration:
{
  "version": "2.0",
  "app_name": "chalice-workshop",
  "stages": {
    "dev": {
      "api_gateway_stage": "api"
    }
  }
}
Chalice can create and handle your application configurations based on a specified deployment stage in your deployment environment. By default, a dev stage is created, but you can add more later to create a proper deployment environment.
To learn more about the config file and various config options, visit the documentation.
Deploy Chalice Application
You can test the API by deploying the application to AWS. This will require your AWS credentials to be configured, so please do so if you have not already.
Navigate to the root of your chalice application and deploy the application:
$ cd chalice-workshop/
$ chalice deploy
Your output should look similar to this:
Creating deployment package.
Creating IAM role: chalice-workshop-dev
Creating lambda function: chalice-workshop-dev
Creating Rest API
Resources deployed:
  - Lambda ARN: arn:aws:lambda:us-east-1:12345:function:chalice-workshop-dev
  - Rest API URL: https://qwerty.execute-api.us-east-1.amazonaws.com/api/
Test Chalice Application
By visiting the Rest API Url from the deployment, you should be able to see that your endpoint succesfully returns the dictionary object from the return statement in the index() function.
$ curl https://qwerty.execute-api.us-east-1.amazonaws.com/api/
{"hello": "world"}
View your Deployment Information
Once your Chalice project is deployed, from the root of your of the project navigate to .chalice/deployed. You should see a file called dev.json. This file contains all the relevant information about the resources Chalice created in AWS for the dev stage.
{
  "resources": [
    {
      "name": "default-role",
      "resource_type": "iam_role",
      "role_arn": "arn:aws:iam::12345:role/chalice-workshop-dev",
      "role_name": "chalice-workshop-dev"
    },
    {
      "name": "api_handler",
      "resource_type": "lambda_function",
      "lambda_arn": "arn:aws:lambda:us-east-1:12345:function:chalice-workshop-dev"
    },
    {
      "name": "rest_api",
      "resource_type": "rest_api",
      "rest_api_id": "qwerty",
      "rest_api_url": "https://qwerty.execute-api.us-east-1.amazonaws.com/api/"
    }
  ],
  "schema_version": "2.0",
  "backend": "api"
}
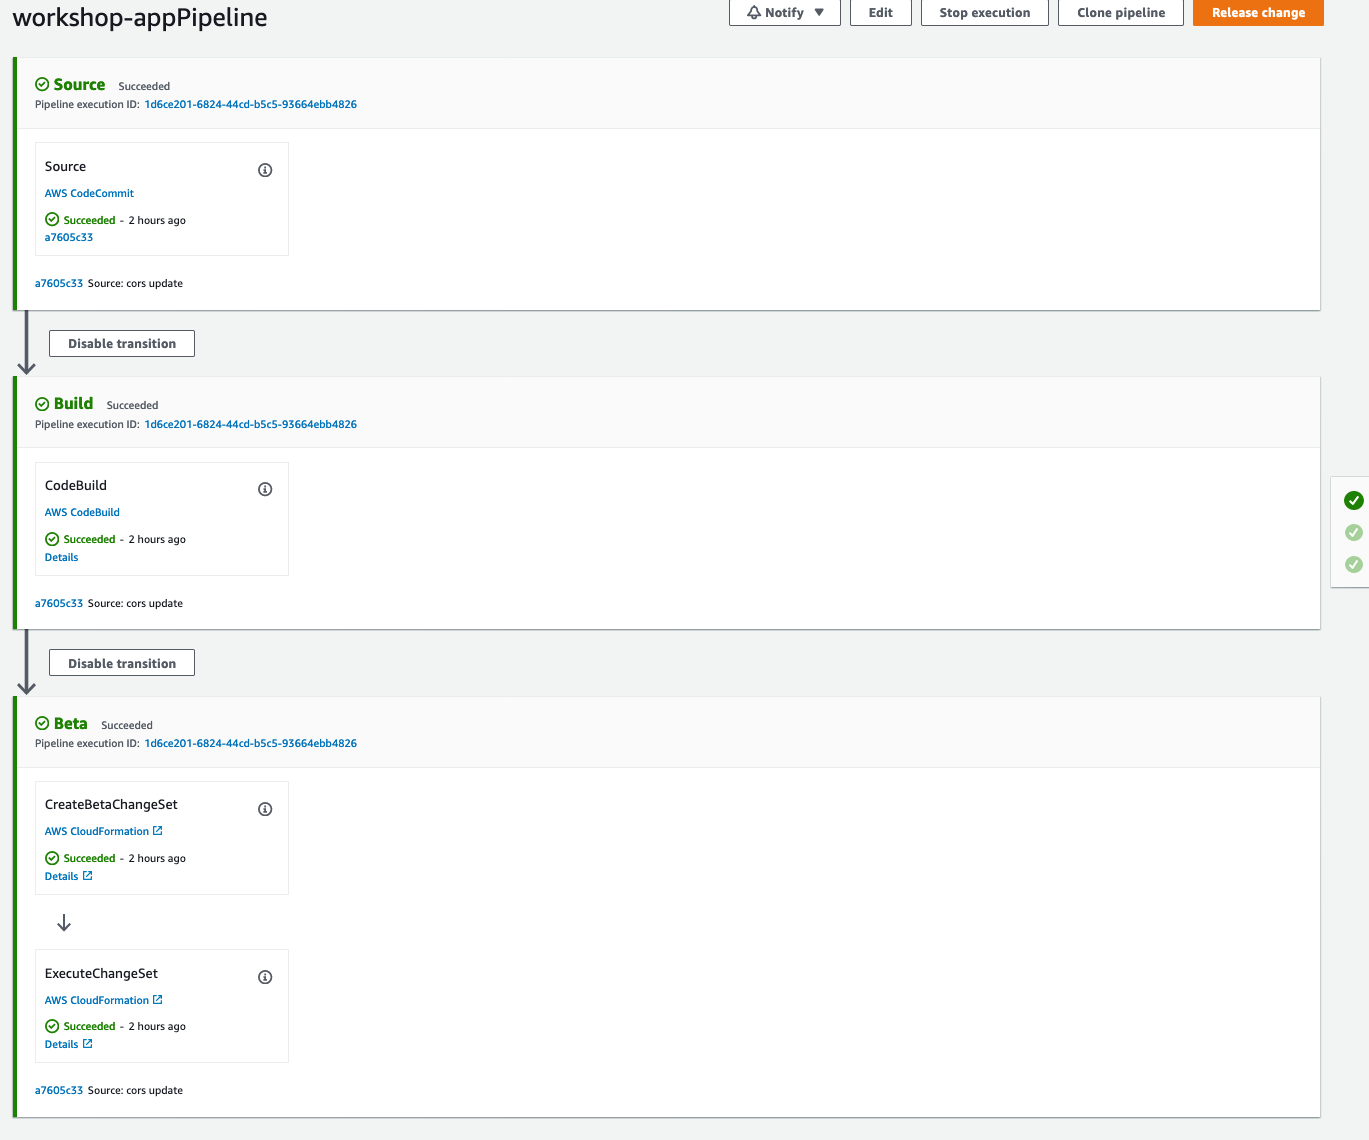
Create CI/CD Pipeline
Setting up a CI/CD pipeline is very easy. From the root of your Chalice project, run the following commands:
$ chalice generate-pipeline pipeline.json
$ aws cloudformation deploy --stack-name mystack
      --template-file pipeline.json --capabilities CAPABILITY_IAM
These commands will generate the following:
- CodeCommit repository where project code will be pushed
- CodePipeline pipeline that coordinates the build and deployment process
- CodeBuild project that builds and bundles code to be pushed to Lambda
- S3 Buckets storing CodeBuild artifacts and application bundle.
Every time a commit is made to the master branch of the Code Commit repository, the pipeline will trigger a transition to the CodeBuild project. Ater the CodeBuild project succeeds, a CloudFormation stack will update your Lambda function and Rest API as well as any relevant permissions.
Note: Pushing code to the master branch and waiting for the pipeline to update your CloudFormation stack can take some time. During the development process, you can use the chalice deploy command to deploy your Chalice project to quickly test your Lambda function and Rest API. However, this command will provision its own Lambda function and API gateway endpoint. You must configure your front end to make API calls accordingly.